There were a few main things that I did to migrate the site without errors:
- Migrated the database and used a Search and Replace to change all instances of the old site URL
- Did a fresh install of WordPress using Softaculous on cPanel (but installing WordPress manually or via another installer would work also)
- Downloaded the WordPress files of the old site, but I only used the “wp-content” folder for the new site.
- Changed table prefixes in “wp-config.php” after database migration to match the table prefixes of the new site
- Changed permalinks to match old site in [WordPress Dashboard > Settings > Permalinks]
- Deactivated PHP Redis plugin (located in [wp-content > mu-plugins])
- Changed permissions of all files and folders in “wp-content” to 775 (could probably also be changed to whatever code was being used on the old site – mine was 775).
Guides that I followed to migrate the site
I followed two primary guides for the site migration:
How to Move a WordPress Site – Without Plugin!
Video: How to MANUALLY Migrate Your WordPress Site (still works in 2022)
The first resource gave two excellent tips that I had not used before:
First tip: Download phpMyAdmin and upload to site’s root directory to export / import database
The first was the fact that phpMyAdmin can be downloaded from the internet, and then uploaded to a website’s root directory for database management. All that is required is to download the phpMyAdmin files, upload them to the origin site / target site, and use the login information for the database located in the “wp-config.php” file:
Second tip: Download Search-Replace-DB to run a “Search and Replace” on the database, once it’s been uploaded to the new site
The program Search-Replace-DB can be downloaded from GitHub and then uploaded to the target site to change the URLs. The URLs in the database need to be changed from the old site’s URL to the new site’s URL. This can be done with some WordPress plugins as well. But I found the GitHub downloaded program to be very easy to use. And the database can be uploaded and have “search and replace” even if the WordPress install is not working yet.
Make a copy of the origin site’s files with the File Manager plugin
I started by downloading the WordPress files from the origin site using the File Manager plugin. I wanted to use File Manager because it allowed me to compress the site files into a .zip folder. This drastically reduces download and upload times for the site’s files.
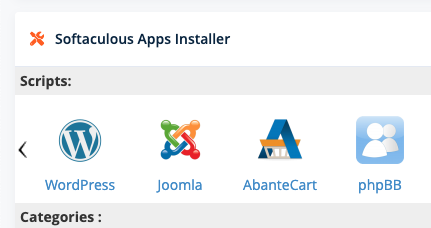
Fresh install of WordPress via cPanel
I went on cPanel and installed a fresh install of WordPress via the Softaculous installer. This takes care of routing issues that result from migration to a new site. I had initially tried to migrate all of the WordPress files to the new site, but I was getting 500 errors and other errors when trying to do it this way.
Using the method of installing a fresh install of WordPress and only switching out the “wp-config” folder allowed me to avoid routing issues / htaccess issues, etc.
Only change out the “wp-content” folder
I connected to the new site via FTP (alternatively, a File Manager can be used, such as in cPanel). I deleted the “wp-content” folder added by the fresh WP install, and replaced it with the “wp-content” from the origin site.
Delete new database tables added by WordPress install, then import database from origin site
The fresh WP install adds database tables to run the new install. If these tables have a different prefix than the origin site, they may be saved, but I believe it makes more sense to just delete them.
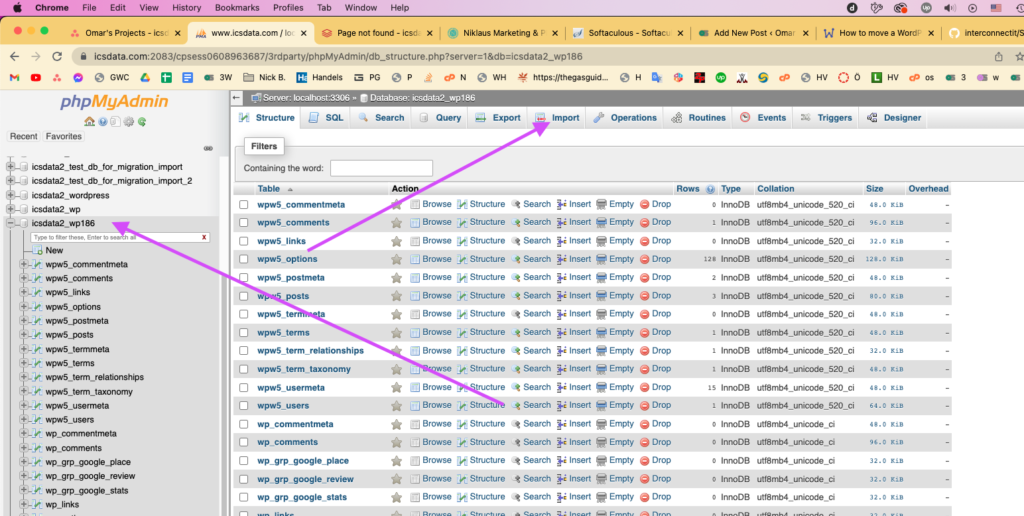
After deleting these tables, the database can be imported from the origin site. As mentioned above, I downloaded phpMyAdmin and uploaded it to my origin / target site’s root directory for use. I used phpMyAdmin to export the old database, and to import it on the new site. Some issues I ran into were that I needed to compress the .sql file after downloading it, to allow it to be uploaded to the new site. I also needed to select the correct database in phpMyAdmin on the new site before uploading the origin site’s database.
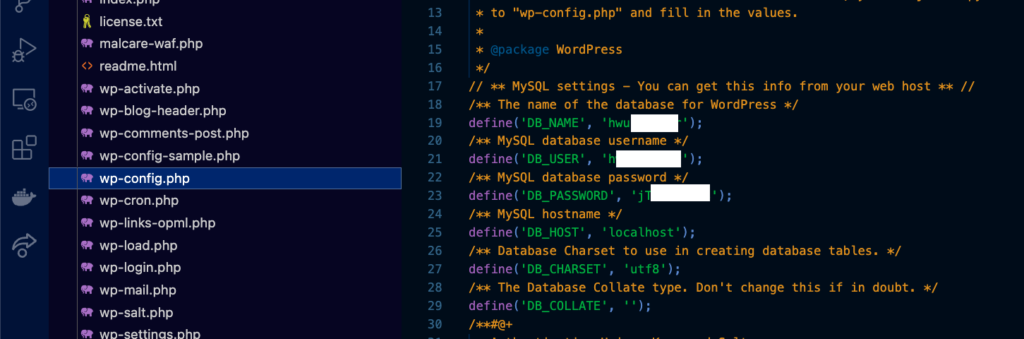
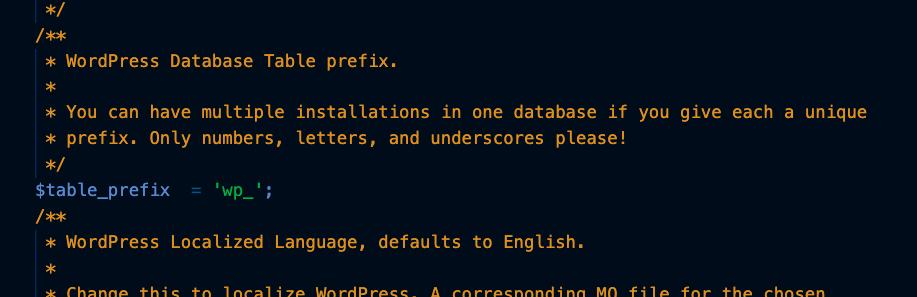
Change “wp-config.php” file to have the correct table prefixes
If the database table prefixes on the new site are not the same as the ones on the origin site, they need to be changed in the “wp-config.php” file:
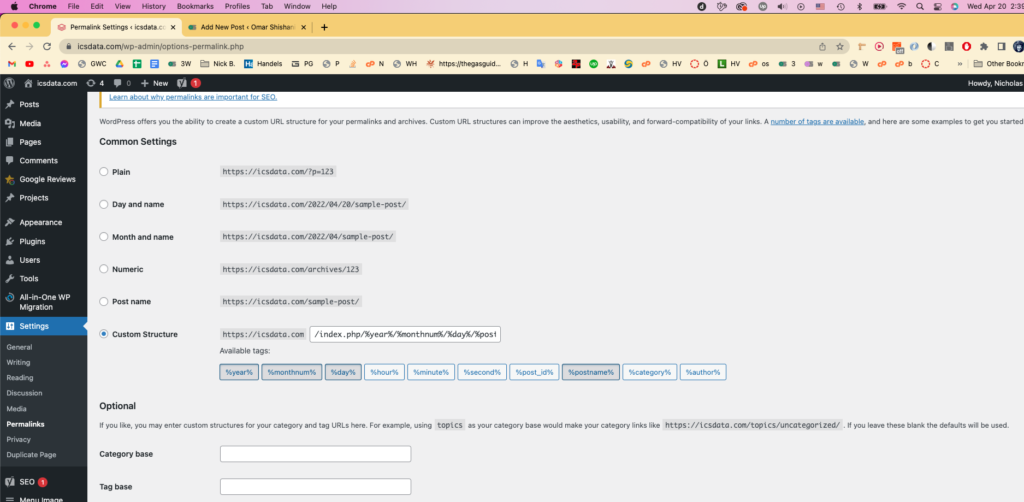
Changed permalinks on new site
The permalinks in the WordPress settings need to match the origin site. I navigated to [WordPress Dashboard > Settings > Permalinks] to compare the origin site and the target site, and to set the settings to match:
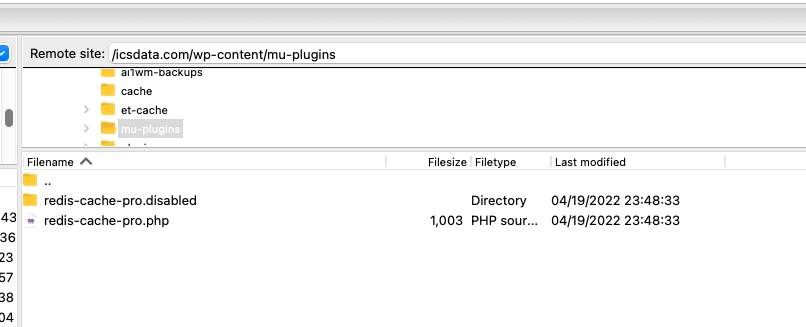
Deactivated PHP Redis plugin (located in [wp-content > mu-plugins])
After doing all of this, I was getting a critical error for both the site’s homepage, as well as /wp-admin. I read the error log printed to the root directory, and found that it was a “Must Use” plugin called Redis Object Cache that was causing this error. It seemed to need some kind of software installed on the server. I couldn’t figure out how to install it, so I deactivated the Redis Cache via FTP. I went into [wp-content > mu-plugins] and changed the folder name from “redis-cache-pro” to “redis-cache-pro.disabled”
I was able to find where this plugin actually was by searching the entire WordPress files with VSCode’s search functionality.
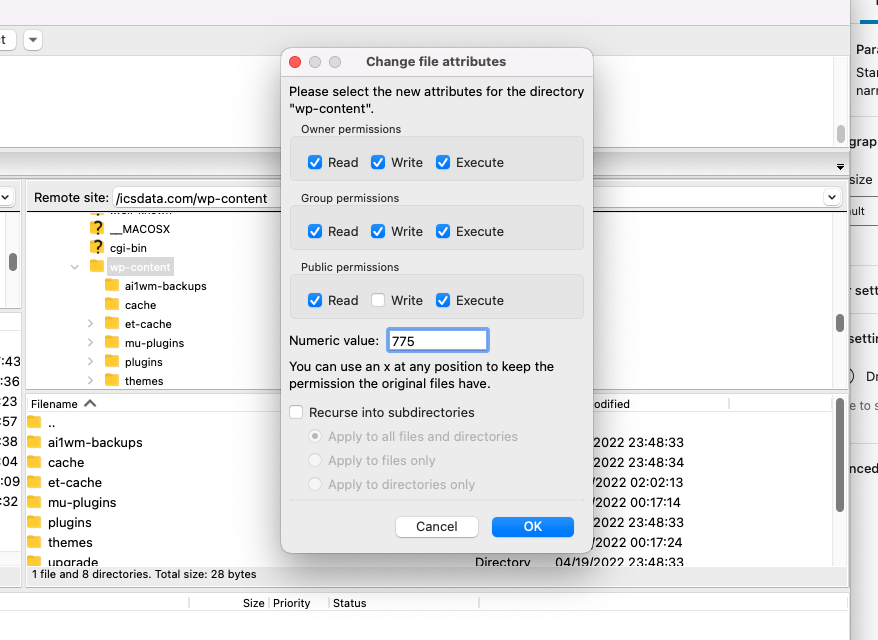
Changed permissions of all files and folders in “wp-content” to 775 (could probably also be changed to whatever code was being used on the old site – mine was 775).
The last error I encountered was that much of the media and files were not loading to the site. It turned out that this was a permissions issue. I found out by inspecting a broken image with the Chrome Dev Tools. I saw that the URL looked fine. I also navigated to the URL’s location in FTP, and saw that the content was indeed there, but navigating to it in the browser was returning a 404 error.
I tested one file by changing the permissions of every containing folder all the way down to the file (so I didn’t have to change everything in “wp-content” just to test, because there was lots). After changing the permissions, the image appeared. So I did a recursive change to permissions to 775 for all files and folders inside of the wp-content via FileZilla:
Finished!
This was the last step. After this, the site was working fine for me. To summarize the main steps from above again:
- Migrated the database and used a Search and Replace to change all instances of the old site URL
- Did a fresh install of WordPress using Softaculous on cPanel (but installing WordPress manually or via another installer would work also)
- Downloaded the WordPress files of the old site, but I only used the “wp-content” folder for the new site.
- Changed table prefixes in “wp-config.php” after database migration to match the table prefixes of the new site
- Changed permalinks to match old site in [WordPress Dashboard > Settings > Permalinks]
- Deactivated PHP Redis plugin (located in [wp-content > mu-plugins])
- Changed permissions of all files and folders in “wp-content” to 775 (could probably also be changed to whatever code was being used on the old site – mine was 775).
Good luck! ?