
This tutorial will walk you through setting up a WordPress server/site on your local machine using Docker and Docker Compose. This can be done extremely quickly if you know the right steps. I show a “Quick Guide” first, and a “Detailed Guide” below.
Quick Guide
Create a folder for the project – we’ll call it “wordpress-docker-compose”. Then, create a .yml file inside the folder (we’ll call it “docker-compose.yml”), and add the code below:
version: '3.3'

services:
  db:
   image: mysql
   volumes:
     - dbdata:/var/lib/mysql
   restart: always
   environment:
     MYSQL_ROOT_PASSWORD: somewordpress
     MYSQL_DATABASE: wordpress
     MYSQL_USER: wordpress
     MYSQL_PASSWORD: wordpress

  wordpress:
   depends_on:
     - db
   image: wordpress:latest
   volumes:
     - wp-content:/var/www/html/wp-content
   ports:
     - "8000:80"
   restart: always
   environment:
     WORDPRESS_DB_HOST: db:3306
     WORDPRESS_DB_USER: wordpress
     WORDPRESS_DB_PASSWORD: wordpress
     WORDPRESS_DB_NAME: wordpress

volumes:
  dbdata:
  wp-content:
Now we can run the database and server by navigating to the directory of our parent folder, “wordpress-docker-compose”, and running the command docker-compose up -d in the command line. The server and DB containers should start. We should then open “localhost:8000” in the browser, to find the WordPress setup page:

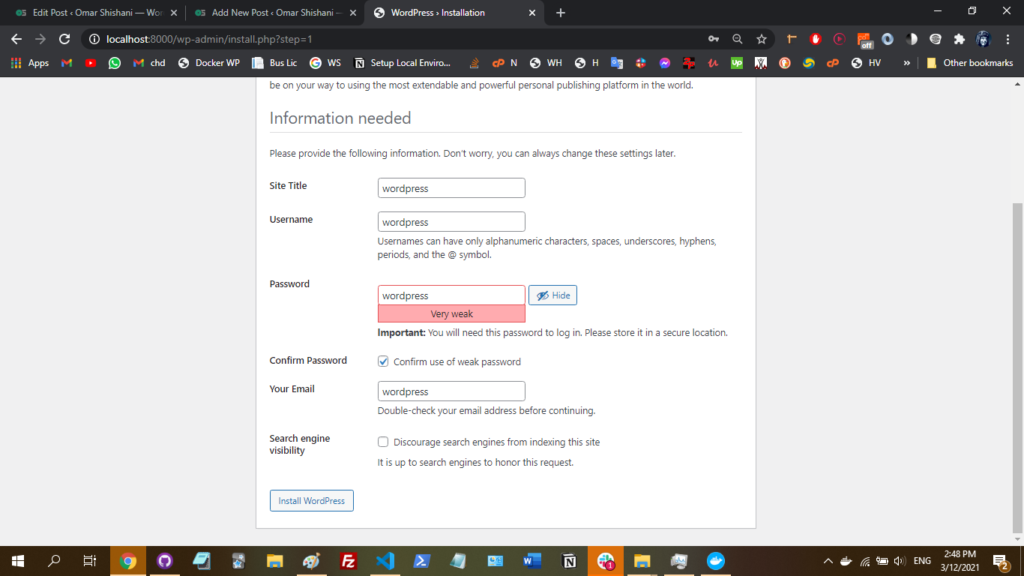
We choose our language, and then input our site information. (I don’t think we need to use any login info that we specified in the .yml file, but it case we do, everything is “wordpress”):
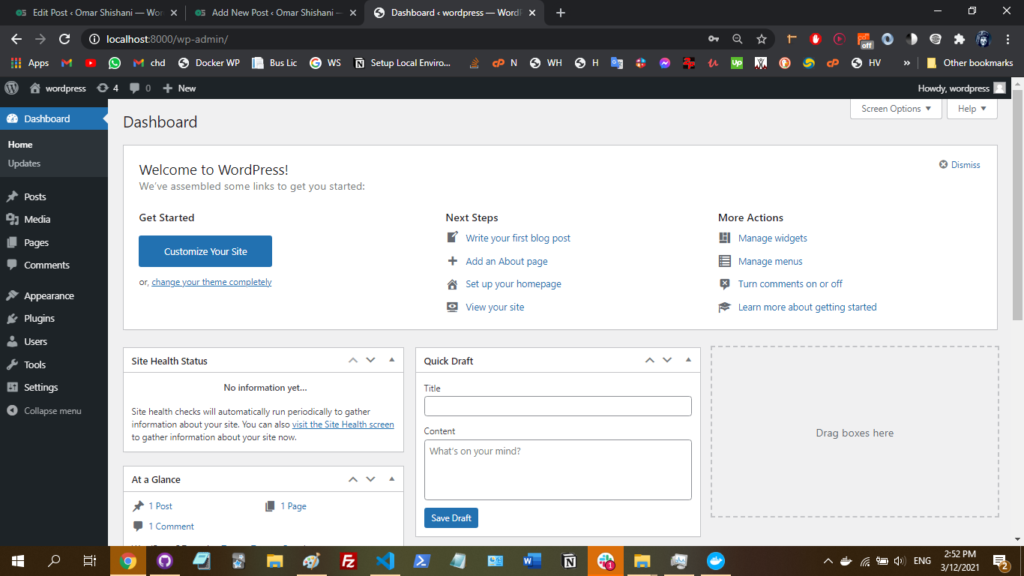
This should bring us to the dashboard, where we can begin working with our site!
Detailed Guide
Create the .yml File
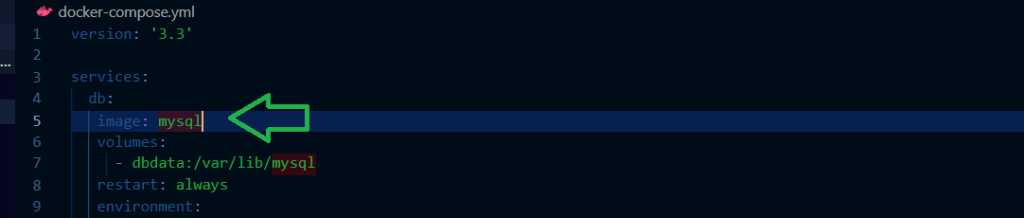
The first step is to use the .yml/.yaml file template for setting up WordPress from the Docker official docs for setting up WordPress with Compose.
I made some modifications to the provided template
The MySQL version number can be specified. If it is not specified, Docker will use the latest version.

Using this .yml file will create two containers: A container for the MySQL database, and a container for the WordPress server.
How to Run the .yml File to Start the Containers
You can run the .yml file and build both containers with a single command: Either the command docker-compose up or docker-compose up -d. Using the former will allow Using the latter will run the containers in detached mode (which means they will run in the background, and you won’t see the process in the command line). The -d flag is identical to the --detach flag.
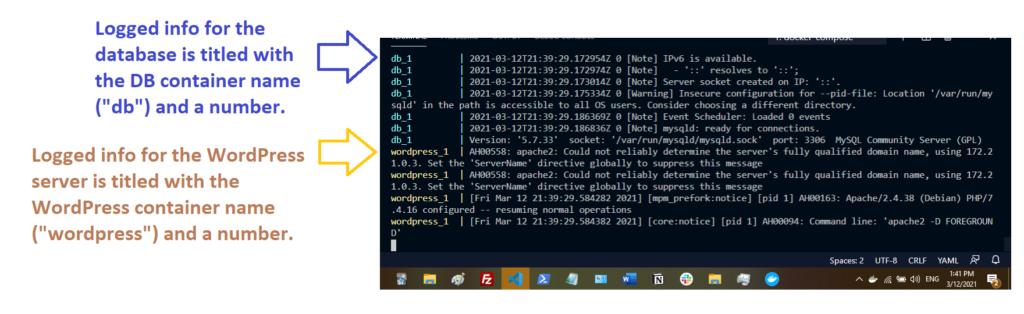
Below is a screenshot of part of the terminal log after using docker-compose up:
And here is a screenshot of the terminal log when using docker-compose up -d:

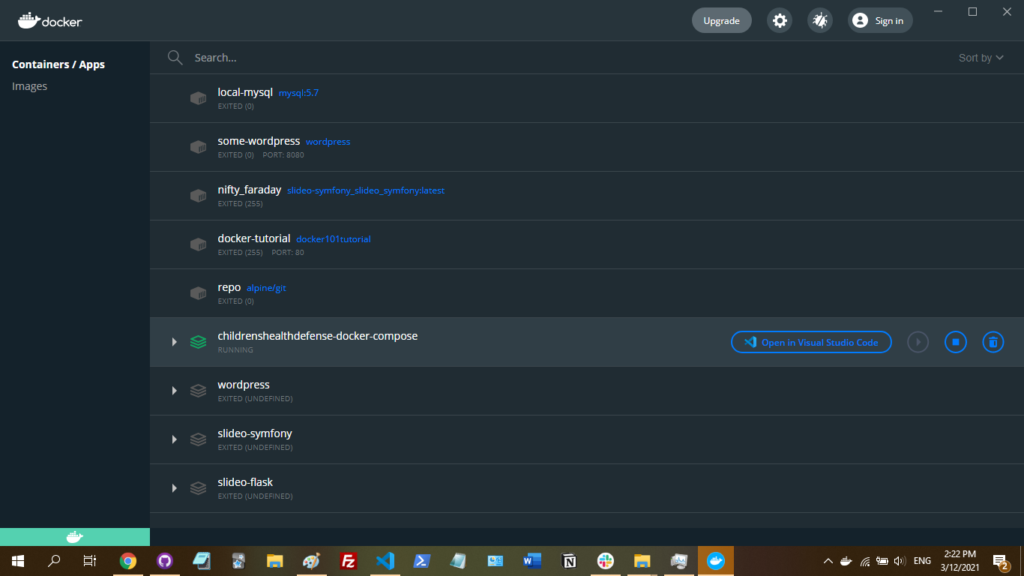
As you can see from the last screenshot, using docker-compose up -d allows you to continue using the same terminal window. In this case, you can view the log of the containers’ processes in the docker desktop app, which I prefer. This can be done by double-clicking the relevant container stack in the desktop app:
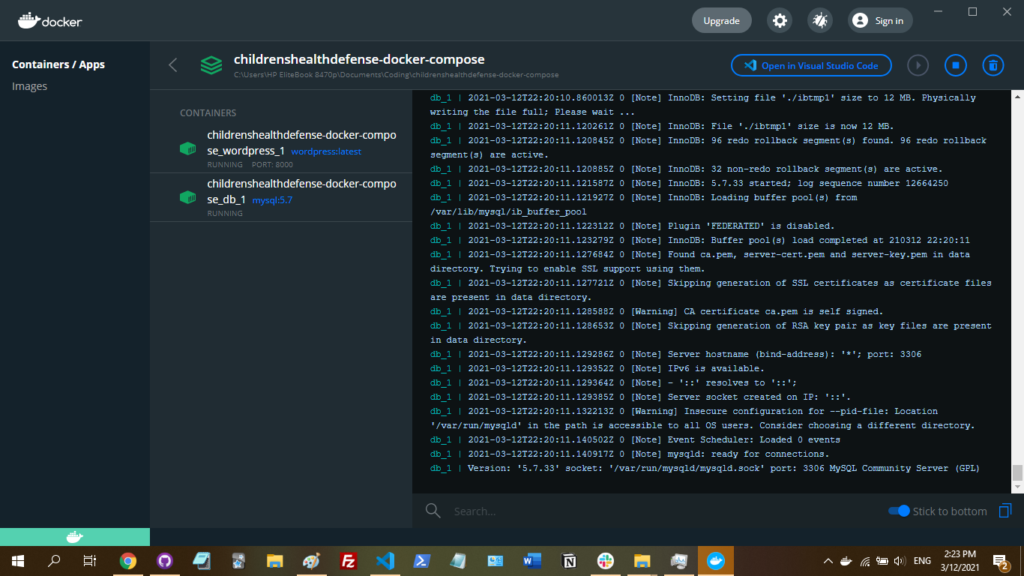
Then you should be brought to a detail window showing you all of the relevant logs:
After Starting the Containers
After runnning docker-compose up -d, you should be able to navigate to localhost:8000, and follow the instructions to set up your site! And that’s it! Once you finish inputting information, you should be taken to the dashboard. I don’t believe you need to use any of the login details specified in the .yml file, but in case you do, all of the usernames and passwords for the DBs and the server are “wordpress”.

Breeching whale by Todd Cravens on Unsplash
Whale tail by by Thomas Lipke on Unsplash