
Intro
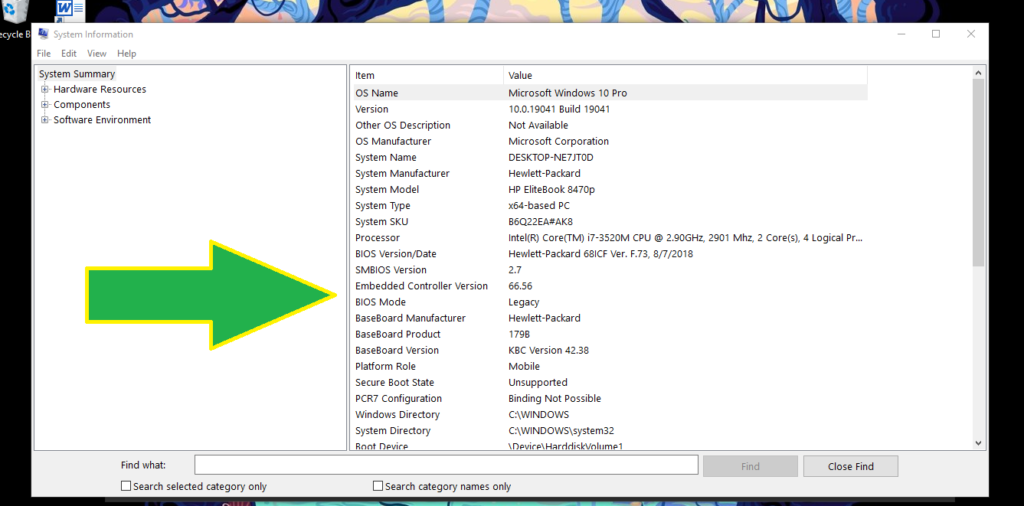
I was trying to enable virtualization so I could run Docker in Windows. The computer I was using was an HP Elitebook 8470p with Windows 10. My computer was running Legacy BIOS mode, not UEFI BIOS mode. This can be checked by hitting “windows + R”, and typing the command “msinfo32”, hitting enter, and viewing the line titled “BIOS Mode”:
I tried entering the BIOS through “Settings”>”Update and Security”>”Recovery”>”Advanced Startup”>”Restart Now”, but there was a menu in this BIOS that was missing – namely to change the UEFI Firmware settings. Instead I found the instructions to enter the Windows 10 BIOS in a different way here. For my computer the directions were the same up to Step 3, and then I figured it out though searching the menu.
Directions
The directions are as follows:
- Power off the computer by holding down the Power button.
- Start up the computer, and press “esc” rapidly. For me, I saw a flash of the “hp” logo before being redirected to the BIOS menu.
- Press f10 as instructed, to enter BIOS setup.
- Navigate to “System Configuration” tab.
- Enter “Device Configurations” menu.
- Scroll down to “Virtualization Technology (VTx)” checkbox and check this box (and optionally “Virtualization Technology For Directed I/O (VTd)” checkbox, which I opted to check as well, even though I didn’t know what it did)
- Save changes and exit.
The steps will be shown with images below.
Step 1: Power off computer by holding down Power button.
Step 2: Start up the computer, and press “esc” rapidly, to enter menu shown below:
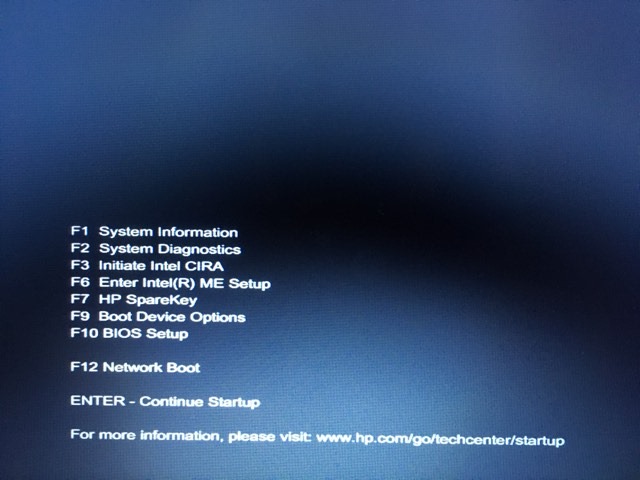
Step 3: press f10 as instructed, to enter BIOS setup.
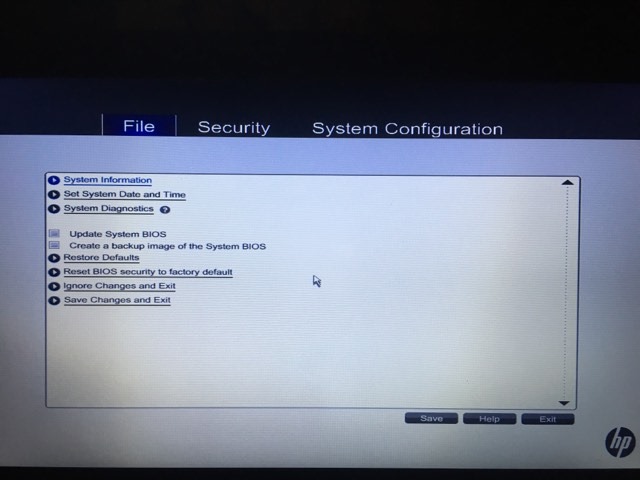
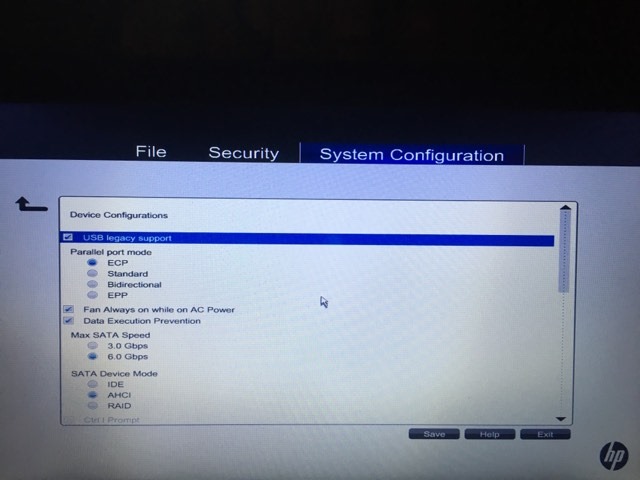
Step 4: Navigate to “System Configuration” tab:
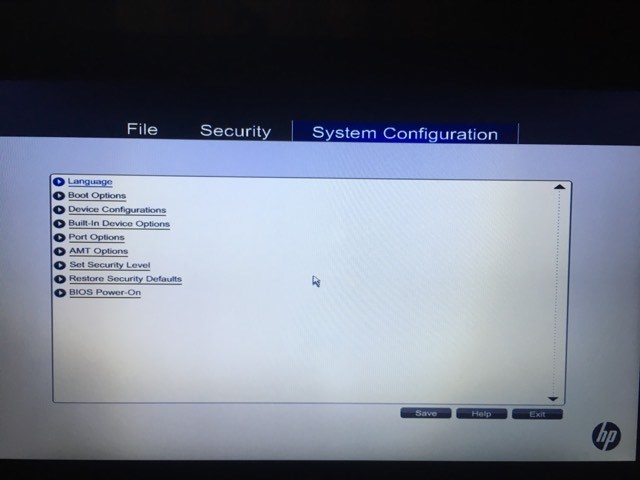
Step 5: Enter “Device Configurations” menu.
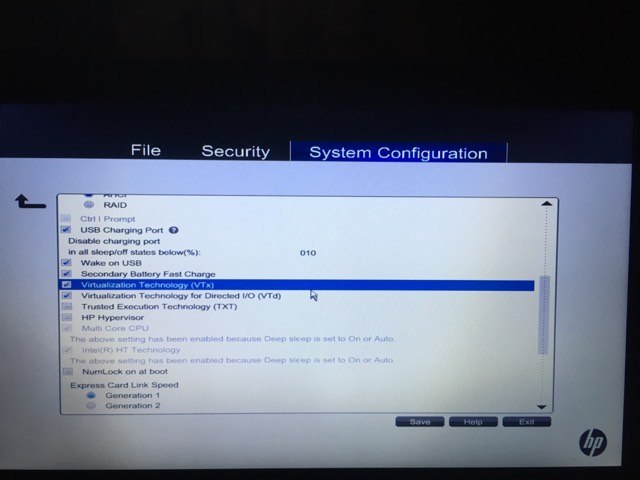
Step 6: Scroll down to “Virtualization Technology (VTx)” checkbox and check this box (and optionally “Virtualization Technology For Directed I/O (VTd)” checkbox, which I opted to check as well, even though I didn’t know what it did):
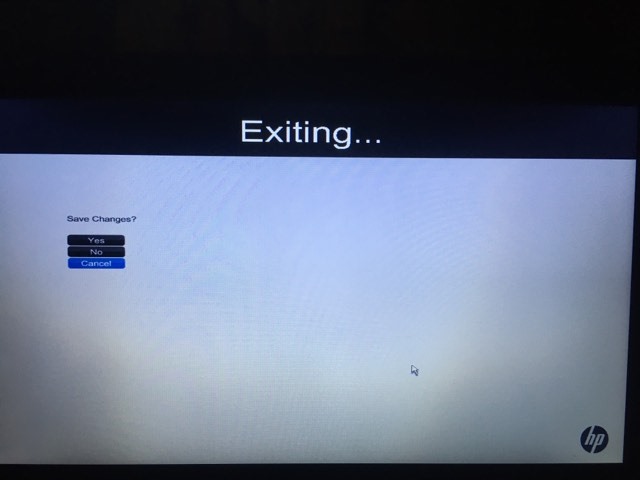
Step 7: Save changes and exit.
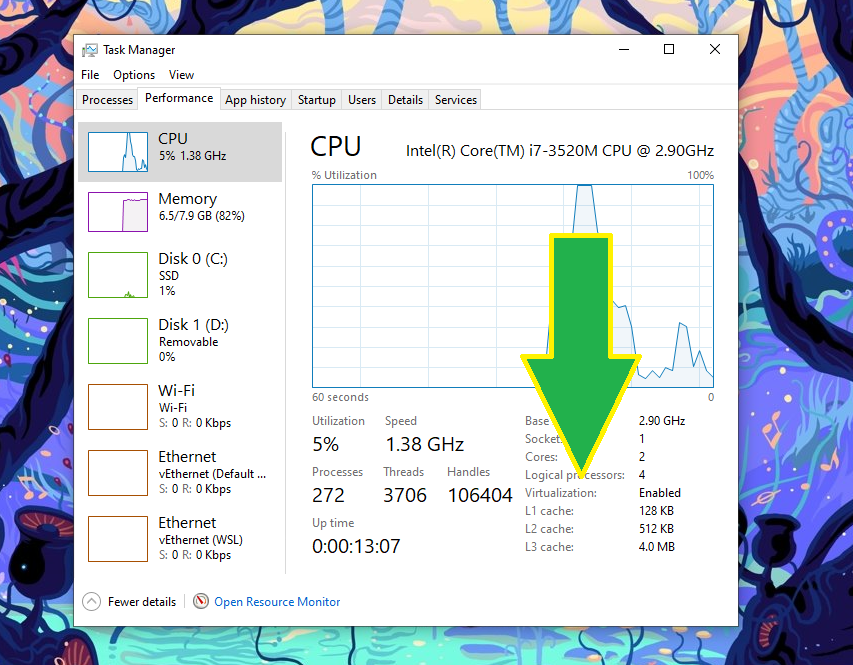
After following these steps my computers virtualization was enabled, which could be confirmed in several ways: one of which is to enter the Task Manager with “ctrl+alt+delete”, and navigating to Performance tab. There you can see “Virtualization” in the lower right corner:
I hope this worked for you! And if it didn’t, good luck, you will figure it out!

Waterfall Pond by Jonatan Pie on Unsplash
Waterfall Cave by Joshua Sortino on Unsplash